With this new tutorial series we are going to make a simple rhythm game using our AudioAnalyzer plugin for Unreal Engine 4. We are going to try to speak from both a theoretical and a practical point of view, resolving the problems that arise with this type of games
Design and main Level
User Interface widgets
Game Actor
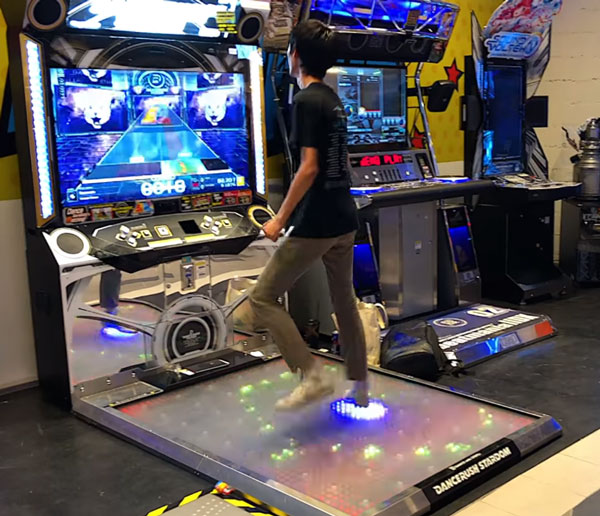
In a rhythm game the player must interact with the game using their sense of rhythm and their ability to press buttons following an specific sequence. In most cases this interaction is done using the hands but we have games that uses devices created specifically for others parts such as the feet or even the entire body as well.
The game
In our game the player will interact with a circular zone in the center of the screen.
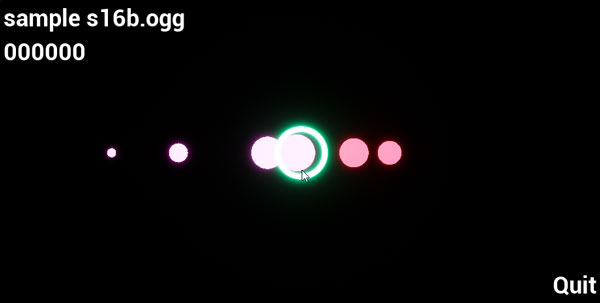
Beats travels from the left side to the right following a trajectory that pass through the circular zone. The player must try to push that zone when the beat is inside to increase the score. If he fail the score will suffer a penalty.
We are going to track only the bass frequency band to generate the beat spheres, in a complete game we can spawn multiple clickable zones and track different frequency bands, like low-mid and high-mid, and generate the beats of each different zone. This can become a great challenge to the player.
The UE4 project
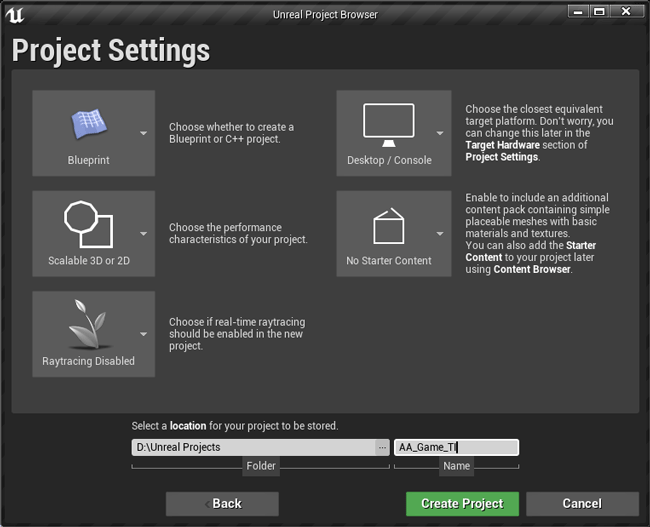
We start creating a new empty blueprint project.
Our first step is to enable the AudioAnalyzer plugin on Editor > Plugins.
Now we can create the folder where the music will be stored. We need to include manually this folder to the directories list to package. On Packaging > Additional Non-asses Directories to Package we can add our new folder.
In this folder we can already put a sample audio file, we are going to choose a file that has the wanted frequency band very clear to be able to calibrate the game. After the calibration we can test the game with a real song.
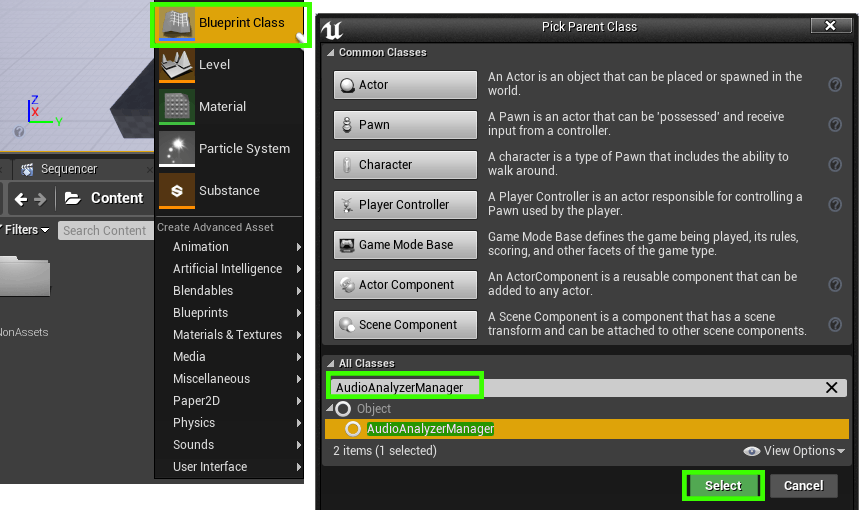
We need to make the blueprint class of the Audio Analyzer Manager parent class. Right click in our Content folder > Blueprint Class > Search for AudioAnalyzerManager class > Select
This Blueprint instance will be the used to make our Audio Analyzer Manager objects
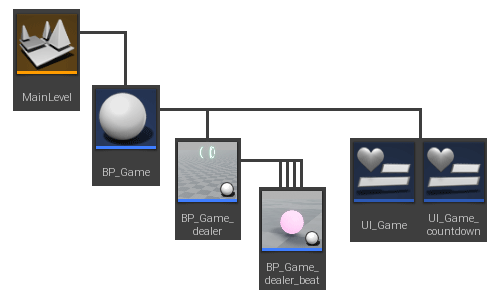
The game controller will be an Actor object (this will be our BP_Game Blueprint class), the Level will only contain this actor and a camera.
The BP_Game must contain the UI widgets and another Actor, the BP_Game_dealer, this class will spawn the beat Actor objects (BP_Game_dealer_beat).
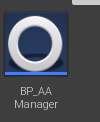
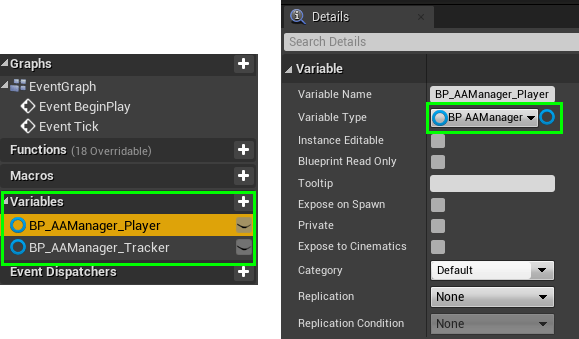
We are going to create 2 audio manager objects (BP_AAManager), one to play the song and other to analyze it a few seconds ahead. To play other sounds like the menu sounds of FX effects we will use the unreal engine audio system.
We could create both variables directly in the BP_Game but instead we can use the GameInstance object to store this variables.
To create our game instance we can do right click on the content browser > Blueprint Class and search for GameInstance.
The game instance is not destroyed when changing levels, for this game with only one level we don’t need this class for it, but if you plain to have, for example, a level for the initial menu and different playable game levels this is the right method. Other advantage of this object is that can be access for any other blueprint class, this will be very useful.
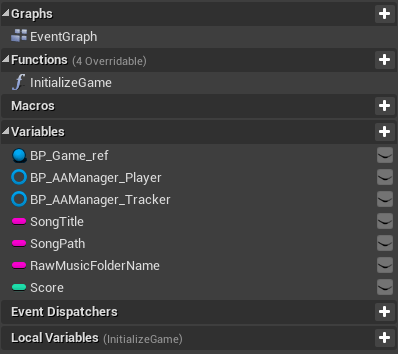
So we are going to create a game instance with the 2 audio managers, the paths to the audio file, the score, and a reference to the BP_Game instance, this reference will be useful to use methods of our game actor from the UI widget without pass a reference directly, for example to pause and resume the playback of the audio.
To access to this variables from any blueprint we need to obtain the game instance of the project and do cast to our game instance implementation.
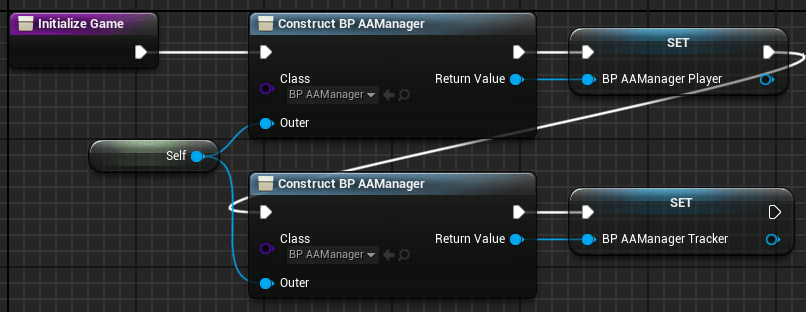
We are going to add a method to construct (Construct Object from Class) our audio managers, setting our game instance as the Outer class. This method will be called when the game start and link the life time of our managers to the life time of the game instance.
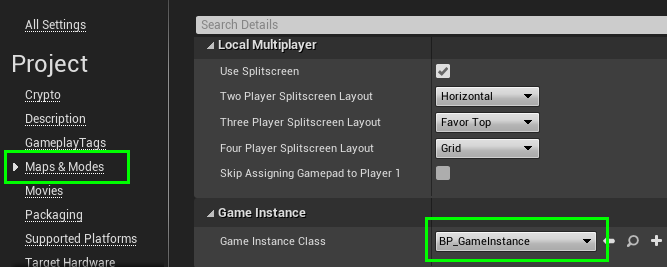
When we have finished the creation of our game instance we need to select this in the project settings. Maps & Modes > Game Instance > Game Instance Class
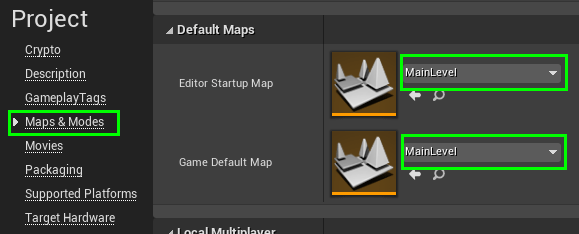
We can save the Level and set it as the default map of the game, in this section too, before start to design the UI and the game actor.
Now we can continue with the more interesting part of the game development
Continued on Part 2: User Interface widgets
Tutorial files
You may also like:
Support this blog!
For the past year we have been dedicating more of our time to the creation of tutorials, mainly about game development. If you think these posts have either helped or inspired you, please consider supporting this blog. Thank you so much for your contribution!







While I appreciate the effort that you put into making this tutorial, I have to say that it is difficult to follow. There are many instances in which you assume that the reader knows what you’re talking about.
I feel that a video would probably make it easier to follow.
I agree. This is my second day trying to go through the documentation, tutorial, tutorial videos
I can’t get the thing to play audio and it doesnt even throw an error
Maybe we can see something if you send me the UE logs to reproduce the problem. [email protected]