Easy steps to start a new mobile game project on UE4, and set up Android project settings
Start the launcher and select the engine version to launch
Now select Blank project, Mobile platform, Scalable 3D or 2D and No Starter Content, and set a project name
Now we can eliminate unnecesary elements of our scene
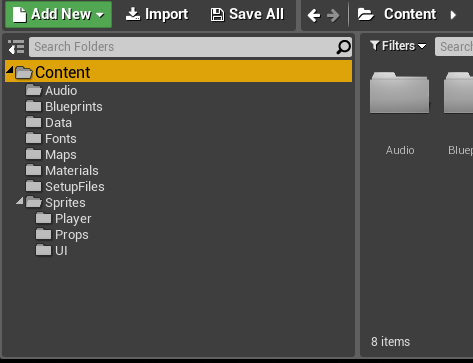
And make some folders to organize our content in the Content Browser using the context menu.
- Audio
- Blueprints
- Data (enums)
- Fonts
- Maps
- Materials
- SetupFiles
- Sprites
- Player
- Props
- UI
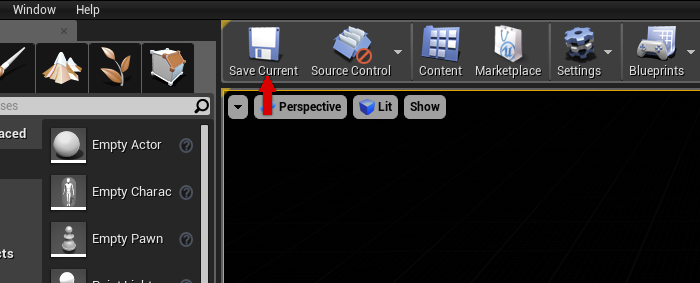
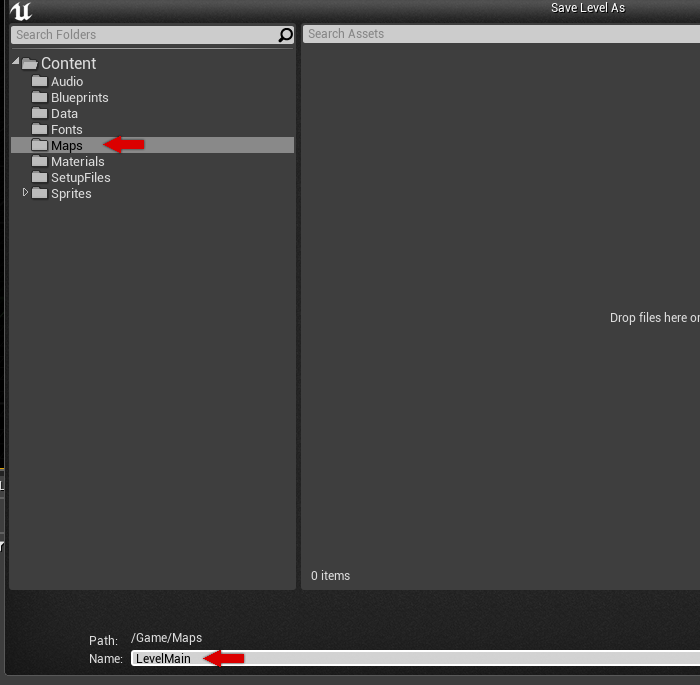
Now save the current level on Maps folder using de Save Current button and set a level name.
Now we can create the setup files, in this tutorial I will use only Blueprint classes by simplicity, another way to do it is create C++ classes and then create an inherited Blueprint class on the editor.
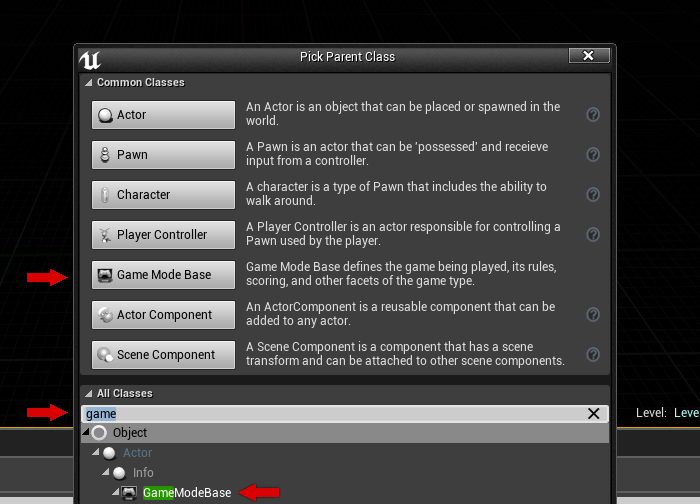
- GameMode
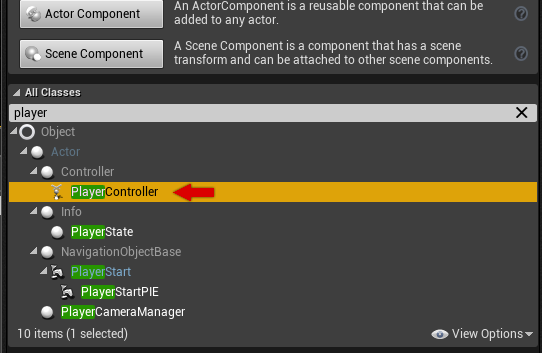
- PlayerController
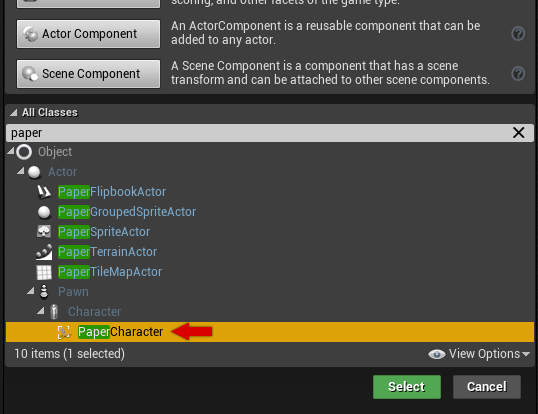
- Pawn(Character)
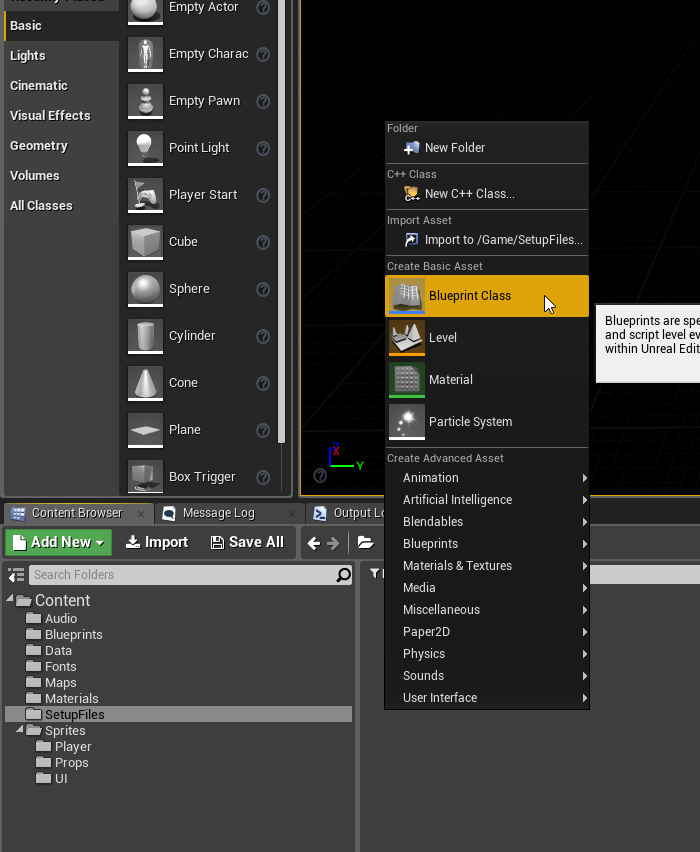
Use the context menu to create a basic Blueprint class
Paper character is like a Character that uses a PaperFlipComponent instead of a SkeletalMeshComponent as a visual representation. A character is a type of pawn that includes the abitily to walk around (Pawn is an actor that can be ‘possessed’ and receive input from a controller)
Player controller is an actor responsible for controlling a Pawn used by the player
Game Mode defines the game being played, its rules, scoring and other facets of the game type. To create a Game Mode we can click on the common classes shortcut or type the class name in the search field and click Select
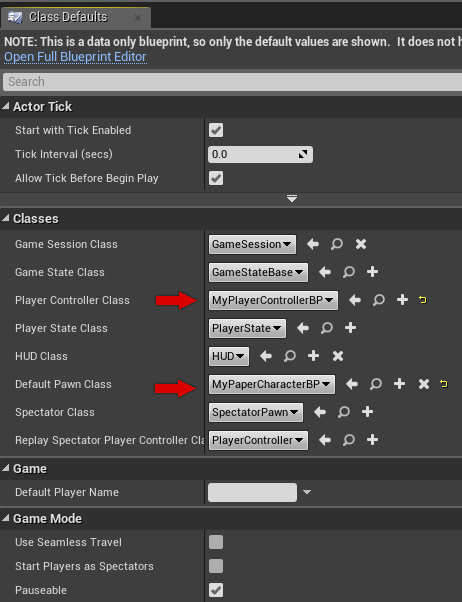
Now we can edit our game mode to use our character and controller. Doing double click open the class for edit, and then select our custom classes using the drop down boxes
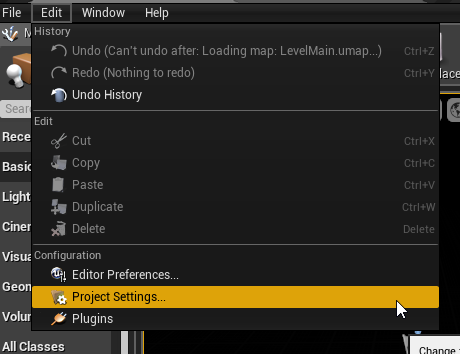
Now we can configure the Project settings, using the main toolbar we can access to the settings panel
In the Description section we can set a project icon of 192×192, a project name, and the window preferences
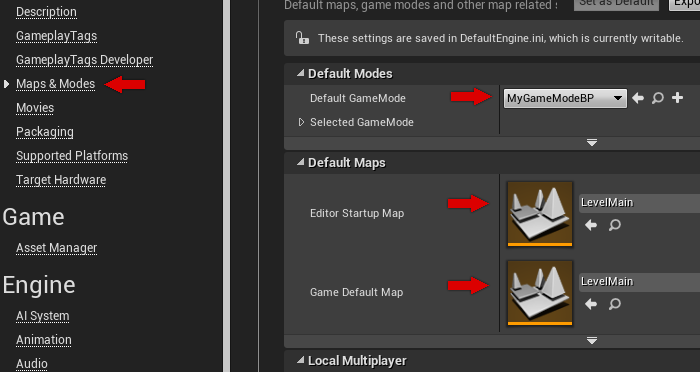
In the Maps & modes section set our GameMode as the default mode using the drop down box and set our default level.
Android section
Our first step is enable android settings edition using the button Configure now in Android section.
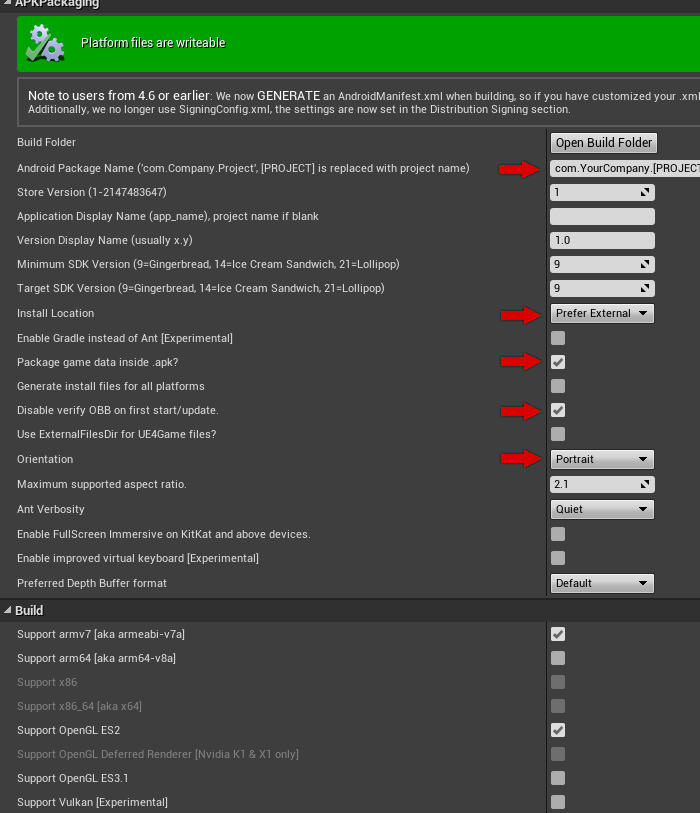
Then we can fill the package name, install location, check package game data inside .apk (See Google play package limits), disable verify OBB on first start/update and select the game Orientation
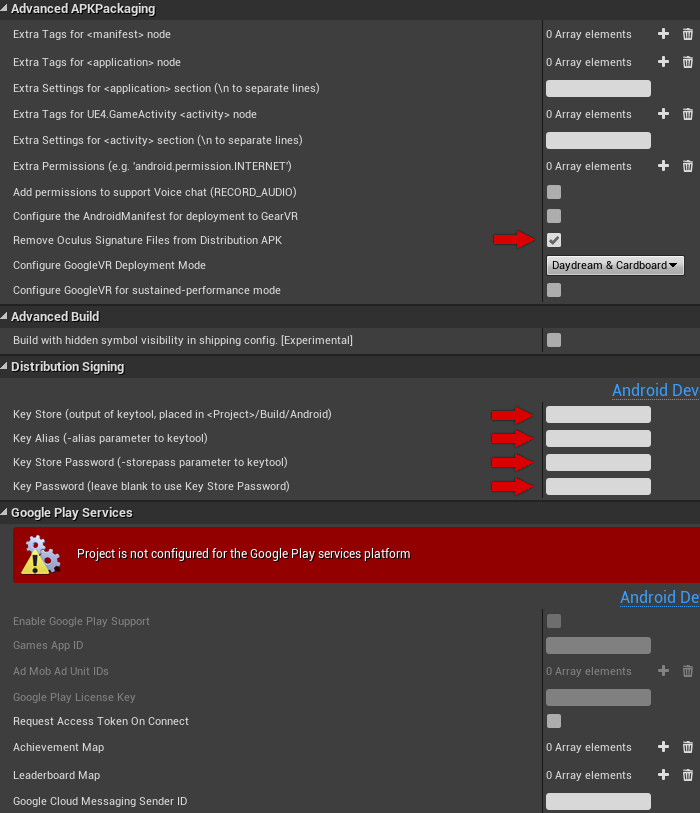
If the game dont use VR we can check Remove Oculus Signature Files from Distribution APK
We can fill the signing data in this section too and set some of the Google play services settings like ads inside the game or google cloud messaging.
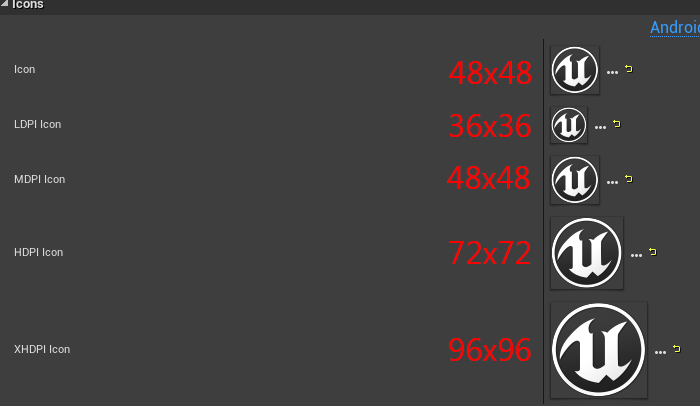
We can set the icons for the different resolutions
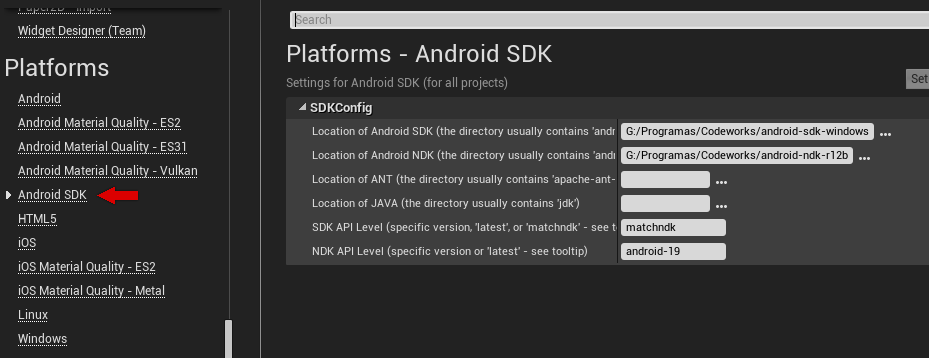
Now we can check de Android SDK configuration, we can skip this step if the environment variables are set correctly, otherwise we need to fill the sources path
Now we are going to create a file with the name ManifestRequirementsOverride.txt and put it in the path /Build/Android/ of our project. This file can be used to add or remove android permissions to the manifest. A basic example: we need a game to gain access to internet and be able to be stored in the extermal storage
<uses-sdk android:minSdkVersion="9" android:targetSdkVersion="9" />
<uses-feature android:glEsVersion="0x00020000" android:required="true" />
<uses-permission android:name="android.permission.INTERNET" />
<uses-permission android:name="android.permission.ACCESS_NETWORK_STATE" />
<uses-permission android:name="android.permission.WRITE_EXTERNAL_STORAGE" />
this list can be modified during the development process to add more permissions
Now we can start the development of our game!!
You may also like:
Support this blog!
For the past year we have been dedicating more of our time to the creation of tutorials, mainly about game development. If you think these posts have either helped or inspired you, please consider supporting this blog. Thank you so much for your contribution!







you didn’t set location for JDK and ANT, is it OK to leave it empty ?
According to Epic Games Android and Html setup is similar if I’m developing for HTML can I leave JDK and ANT path empty ( will it reduce my apk size )
thank you. RWMPGASBR
If you want to build for Android, you will need to set JDK and ANT location. I have left this sections empty beacause I already have two enviroment variables JAVA_HOME and ANT_HOME to the SDk locations, and the Path to the binaries folder too.
Keep it empty if you are building for HTML should not influence in the package size.
thanks.